
If you’re one of those people who religiously clear all of your notifications every time you go to bed, you’re going to love the new view-cleared notifications feature in iOS 11. With this new feature, you can see all of your notifications, even the ones that have been cleared, in one place so you can easily see what’s coming and not miss anything.
How to clear notifications on your iPhone
If you’re having trouble clearing notifications on your iPhone, don’t worry. This article will walk you through the necessary steps.
- First, open the Settings app on your iPhone.
- Next, scroll down to the “Notifications” section and tap on it.
- You’ll now see a list of all of the notifications that are currently active on your device.
- To clear a notification, simply tap on it and then select “Clear.”
- If you want to permanently delete a notification, tap on it and then select “Delete.”
How to view cleared notifications on your iPhone
When you clear notifications on your iPhone, you’re essentially telling the iPhone to stop trying to send you notifications for those certain apps. If an app doesn’t have a notification system that works this way, the app may continue to send you notifications even after you’ve cleared them from your iPhone.
Clearing notifications doesn’t mean that you won’t see any notifications from that app in the future- it just means that you won’t receive notifications for that app until you decide to turn them on again.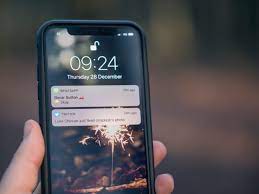
How to make sure you don’t miss any important notifications on your iPhone
- Open the Settings app on your iPhone and scroll down until you see Notifications.
- Tap on Notifications and then scroll down until you see the list of all of your notifications.
- Select the notifications you want to clear and then press the red X at the top of the screen.
- If you want to keep the notifications for a future notification, tap on the blue arrow next to the Keep For Next Notification option and then select the time for which you want to keep the notifications.
- Press the red X at the top of the screen to clear all of your notifications.
Tips for managing notifications on your iPhone
Managing notifications can be a tiring experience, especially if you have a stack of them from all of your different apps. But there are ways to make it a little bit easier on yourself, and that’s what we’re going to discuss in this article.
First and foremost, it’s important to understand that notifications are a valuable resource. Not everything needs to be pushed to your iPhone’s notification center, and some things can be skipped altogether.
Must Read: How To Turn Off Safesearch On Iphone | Simplest Guide
That being said, there are a few things that you should keep in mind when it comes to managing your notifications. Here are a few tips:
1. Know your app’s notification settings.
Most of your apps have their own notification settings, and you’ll want to take a look at them to see what’s important to you. Some apps will let you customize the notification settings on a per-app basis, while others will let you customize the notification settings for all apps in your library.
2. Consider disabling notifications for certain apps.
If you don’t need to be alerted every time someone posts a new comment on your blog post, you can disable notifications for that app. This will prevent the app from bothering you with notifications, but it will still be able to send you to push notifications for new comments.
Conclusion
Cleared notifications on your iPhone indicate that the notification has been dealt with and is no longer pending. Clearing notifications on your iPhone can help you avoid distractions and stay focused on your tasks. By clearing all notifications, you can focus on the task at hand and avoid being interrupted. Plus, when you need to take a break or return to your work, you can quickly clear all notifications without having to search through them.

